
Nest thermostats are notorious for their intelligent features that prevent users from creating a permanent hold at a specific setpoint.
Even if you adjust the temperature, smart features such as auto-scheduling and home/away assist can override this, adjusting the temperature as needed.
So in this guide, I’ll show you how to disable these and set a temperature that won't change without your input.
What is a Hold On a Nest Thermostat?
For Nest and many other smart and programmable thermostats on the market, a “hold” refers to a temperature setting that overrides the current schedule and lets you maintain a specific temperature temporarily or until you turn it off.
This function is handy in situations where you need to break out of the programmed schedule and take full control of the thermostat’s temperature.
Situations, where you would want to “hold” the temperature on your Nest thermostat, include:
- When you have guests over
- You plan on staying up late
- You’re leaving for vacation
- When the thermostat has a hard time finding a comfortable temperature due to extreme outside temperatures
- When the thermostat doesn’t read the temperature inside your home very accurately
- When you’re doing repairs or renovations to your home
- When you’re circulating air inside your home, usually with the windows open
So even if your thermostat can handle most situations with home/away assist and Eco temperatures, there can be certain instances where you would want to manually adjust the temperature and make sure it stays that way.
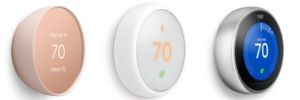
Compatible Models
For the previous models of Nest thermostats, such as the Nest E and Nest Learning, the hold feature wasn’t directly available. However, after customer feedback, Google introduced a much-needed hold feature on the latest Nest thermostat.
So if you have the Nest thermostat 2020 model, you’re in luck since you can easily create a temporary or permanent hold.
That said, if you have a Nest Thermostat E or any of the Nest Learning thermostat models/generations, you might have to disable certain features before you can adjust the temperature and expect it to hold.
Managing Holds via Google Home
Mobile app to control your Nest thermostat and other smart home devices

When it comes to the latest Nest thermostat, you can easily override the schedule and set up a temporary or permanent hold.
A hold can be set up or canceled via the Google Home app or the thermostat itself.
Creating or Setting Up a Temperature Hold
- First, open the Google Home app and tap on your thermostat's tile icon.
- You’ll be greeted by the Nest thermostat’s home screen. Here, check the thermostat’s current settings and make sure the system mode is in either Heat, Cool, or Heat • Cool mode.
- Then, adjust the desired temperature on the home screen as desired.
- After that, tap on the ‘Hold temperature' setting (Clock icon). From the menu that opens up, pick either the “current temperature” or any other preset you want to maintain during your hold.
- You might also have the option to set or pick the “end time” for this hold. If you choose the Eco preset, you can hold the temperature indefinitely. Meanwhile, other presets can only hold for a maximum of 24 hours.
- To confirm your temperature hold, tap on “start.”
As you can tell, this isn’t the most flexible setting since you’re limited to 24 hours with any custom temperature setpoint.
If you’re hoping to use a hold indefinitely, you'll have to pick the “Eco” preset.
Canceling a Temperature Hold
To create a new temperature hold or make your thermostat return to its existing schedule, you'll first need to terminate the current hold. To do so:
- Launch the Home app and locate the tile of your Nest thermostat.
- Check that the thermostat is in the mode (Heat, Cool, or Heat • Cool) that matches the ongoing hold.
- Click on ‘Hold temperature' then tap ‘End hold.'
After that, you can let the thermostat run according to its automated schedules or create a new hold as desired.
Temperature Holds On Nest Thermostat
Latest 2020 model with a mirrored screen and replaceable batteries

Similar to the Google Home app, you can easily set up temperature holds on the thermostat’s screen itself.
Setting up a Hold via the thermostat
- Wake up the thermostat screen and tap on the ring button to open the quick-view menu.
- Scroll to “Hold” and tap on the ring button. You can easily identify this setting as it’s indicated as a clock icon with hands.
- When inside this setting, you get to pick between holding the current temperature or adjusting your temperature as desired.
- After setting your temperature, tap on “Continue” to set the time
- To define the duration, you can scroll to adjust the time in 30-minute increments.
- To finalize your hold, scroll down and tap on ‘Confirm.'
As usual, if there's an existing hold, you'll need to cancel it before applying any changes.
Canceling or Modifying a Hold via the Thermostat
Ending or modifying a temperature hold is just as easy.
- As mentioned in the previous steps, you need to go to the Menu view and select ‘Hold.'
- By selecting ‘Stop,' you can cancel the existing hold.
- After that, you can set up a new hold or exit the menu.
Configuring Any Nest Thermostat to Hold Temps
Applies to the entire range of Nest thermostats available in the market
Under the default settings, most Nest thermostats have a mind of their own. As such, their “smart” features allow them to adjust the temperature using the auto-schedule, home/away assist, and eco temperature settings, even after the user has adjusted the temperature to a specific setpoint.
Luckily you can disable or halt these automated features on any Nest thermostat and configure them to run manually as a traditional thermostat.
So to make that happen, you need to:
- Disable the auto-scheduling function
- Configure both Eco temperatures to “Off”
- Disable home/away assist
- Reset/Clear the schedule
For a detailed step-by-step on how to disable these settings, check out my guide on Nest thermostat manual overrides.
Manually Controlling Your Nest Thermostat
After carrying out these changes, you can easily set the temperature to your desired setpoint and the Nest thermostat will hold it permanently.
However, with great power comes great responsibility, so make sure to constantly monitor the thermostat and optimize the temperature so you can save energy without compromising on overall comfort.
To make monitoring and manually controlling the thermostat more convenient, I highly recommend linking your thermostat with the Nest or Google Home apps and controlling it remotely.
Conclusion
With smart features such as auto-scheduling and home/away assist, the thermostat will always take command and adjust your temperature according to its protocols.
So under the default settings, it’s very unlikely that your desired setpoint will be maintained by your Nest thermostat.
To combat this, you can disable these automated features, which will help you prioritize your manual temperature settings, making it function as a traditional thermostat.