
Knowing how to take off the faceplate and other pieces is super important. When you're looking to swap out the battery in your Ring doorbell or bring in a new gadget, this know-how really comes in handy.
It's not difficult per se, but there are a few things to be aware of.
Below, I provide step-by-step instructions for each Ring doorbell version.

Ring Specialty Screwdriver
Almost every model of Ring doorbell is held together with Torx screws.
These are star-shaped screws that are meant to be tamper-proof. Therefore, you can't open the doorbell using a regular screwdriver. These require a Torx screwdriver of compatible size (Typically T6 or T15 as you can see in the image below).
So, if you don't have the screwdriver that came with the box, or a Torx screwdriver set handy, I recommend you pick one up from Amazon. For more on this, check out my article here.

Note: For the Peephole cam, you'll need the peephole key instead of a Torx screwdriver. It's also available at the link above.
At SmartHomePerfected, I always advise readers not to take on tasks they are not skilled at, particularly electrical tasks. So if you’re in any doubt, it is best to seek the assistance of a professional.
For hardwired doorbells, don't forget to cut the power to the doorbell transformer before you start. This helps protect you from electrical faults while also safeguarding your equipment.
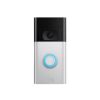
Ring Video Doorbell 2nd Gen (Battery)
Battery Powered Video Doorbell
The Ring Video Doorbell 2nd Generation improved upon several aspects of its predecessor. However, there are not a lot of changes in the mounting system.
So here's how you remove the 1st and 2nd generation Ring Video doorbells:
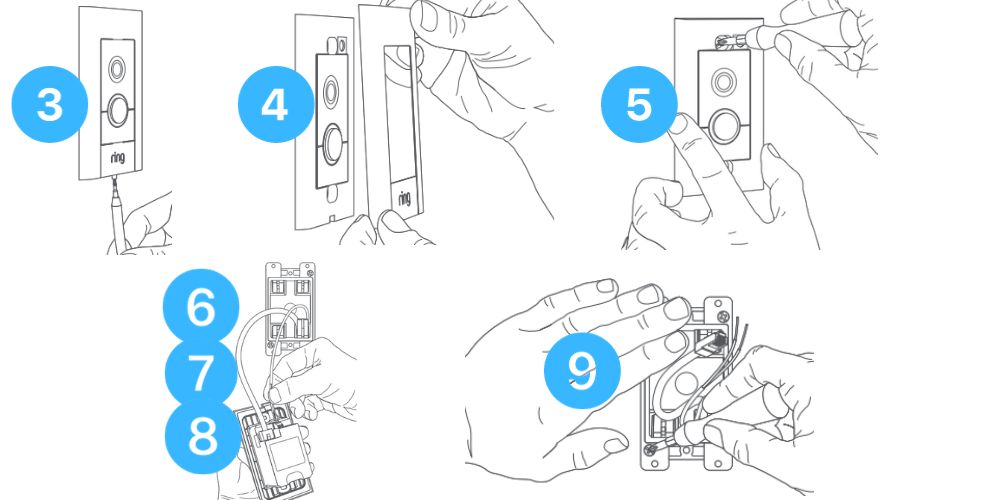
- If you have a hardwired video doorbell, disconnect the assigned circuit breaker first.
- Then, take out the special screwdriver included with the video doorbell
- Switch its driving bit to the smaller star-shaped torx end.
- After that, look for the two torx screws installed in the bottom of the Ring doorbell.
- Unscrew these using the included screwdriver and keep them in a safe place.
- You can then easily lift the doorbell up and away from the mount.
- If it's a hardwired doorbell, make sure to loosen the screws holding the transformer voltage terminals.

Ring (Battery) Plus, 3rd and 4th Gen
Video Doorbells

The Ring Video Doorbell Plus Battery version is surprisingly easy to install and remove because it's a recent model. Here's how:
- If your doorbell is hardwired, cut the power to the doorbell first.
- Take out the security screw on the bottom of the Ring video doorbell Plus. Use the Torx-head screwdriver,
- After that, remove the battery cover. Lift it up and away.
- Then, remove the battery by pushing it into the metal tab. The battery will loosen up.
- Then, let the battery slide down and out from the doorbell.
- After that, loosen the four screws on the four corners of the doorbell.
- If it's battery-powered only, you can pull the doorbell away from the mount. Otherwise, you'll have to unscrew the transformer terminals before yanking it out.
Ring Peephole (Battery)
Video Doorbell

You can remove the indoor and outdoor assemblies of the Ring peephole cam.
Here's how:
- First, hold on to the cover plate on the indoor assembly and press it in from both sides.
- This will loosen it up, and you can then pull it towards you to remove it.
- After that, gently pull on the black cable or clip to loosen it up from its channel.
- When the cable is slack, you can start to loosen the tightening nut using the peephole key.
- Turn it anti-clockwise to loosen. However, make sure you hold on to the outdoor assembly while doing so.
- Then, remove the tightening nut and keep it in a safe place.
- You can now gently pull out the indoor assembly. Make sure you don't disturb the ribbon cable or the peephole tube.
- Finally, you can gently pull out the outdoor assembly.
- If you installed an adapter to the peephole tube, don't forget to take it out as well.
Ring Video Doorbell Wired, Pro and Pro 2
Video doorbells

Ring doorbell wired doesn't include a fussy mounting plate. Therefore, you can easily unscrew it from the wall.
So here's how you take it out:
- First, disconnect the power to the doorbell transformer.
- Then, undo the torx security screw on the underside of the Ring doorbell.
- After that, pull the faceplate towards you to take it out.
- Loosen the top and bottom screws using a Phillips head screwdriver.
- Take out the two screws holding the transformer terminals.
- Finally, you can remove the Wired Ring Video Doorbell.

Ring Video Doorbell Elite
Video Doorbell with Network Cables

The Ring Elite might seem intimidating because it has PoE and Doorbell wiring. However, removing it is a simple procedure. Simply follow the included instructions and safety precautions outlined below:
- First, disconnect the power to the doorbell transformer.
- Then, switch off the PoE adapter for the Elite PowerKit.
- After that, undo the torx security screw at the underside of the Ring Elite doorbell.
- Then, you can easily pull the faceplate right off the wall.
- Unscrew the two fasteners at the top and bottom of the doorbell using a Philip's Head screwdriver.
- Then, pull the doorbell from the mounting plate. You will have access to the ethernet cable and transformer wires.
- Undo the screws holding the transformer wires and pull out the ethernet cable.
- You can gently pull out the Ring doorbell elite from its mounting bracket.
- If necessary, you can also remove the mounting bracket. Do this by removing the screws at the top right and bottom left.
Wrap Up
As you see, with the right tools, anybody can remove the Ring Doorbell from its mount – you don't need to be a DIY master!
Hopefully the guides above help and feel free to drop me a comment if you run into any issues.
Cited Sources
- https://support.ring.com/hc/en-us/articles/360025997592-Moving-Home-With-Your-Video-Doorbell-and-Security-Cameras
- https://support.ring.com/hc/article_attachments/360075352132/RVD1_G2_US_rec__1_.pdf
- https://support.ring.com/hc/article_attachments/360074442231/RVD3_Plus_manual_US-ANZ_English_v2-1_web.pdf
- https://support.ring.com/hc/article_attachments/17257029434004